This year, before we were able to finish designing and building our 2024 robot Bothoven, I was busy at home reconstructing the field in Godot from the CAD models provided by First to make a semi-realistic simulation.
Building the field#
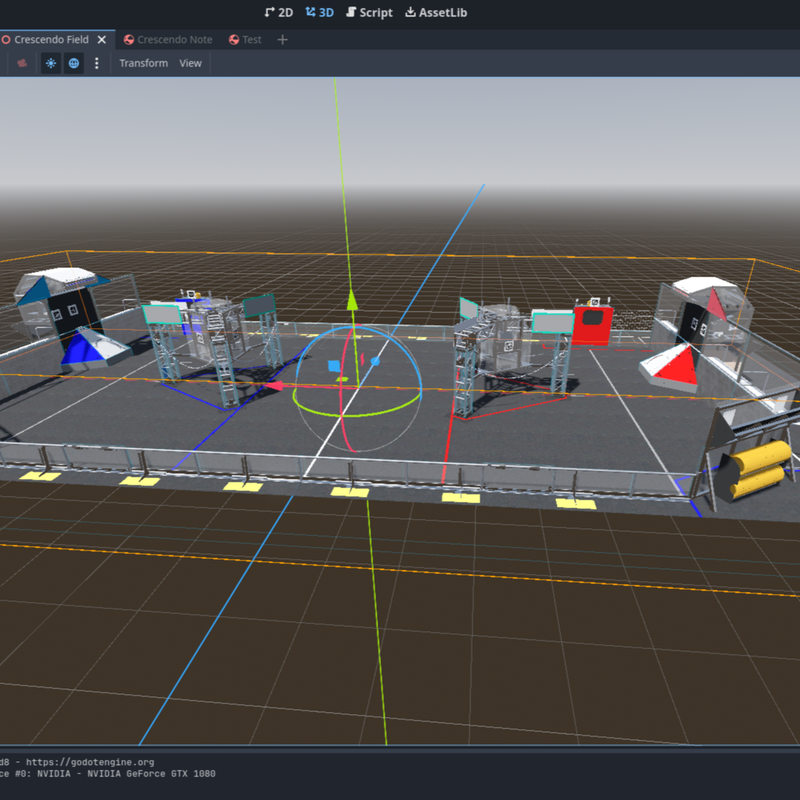
To make a good simulation you first have to start with the environment. In this case, it would be the FRC field. I first imported the CAD model from the Onshape page into Godot, however, all the textures and colors were gone due to the file format/Onshape. To fix this I made scripts in Godot to help apply textures I sourced online. I grabbed the carpet texture from the manufacturer’s website, images from first, and textures from various online sources. When I was done it looked something like this:
After it looked good, I had to add collision to the walls and floor. Again, I made another script to help with this. After the painful process of texturing and colliding, the environment was finally done.
Building the first robot#
After creating the field it was time to make the first robot. The initial robot was simple, it was the default Godot car, which was good at the time but this simplicity would come at a heavy cost down the road. For now, though, everything worked great so I quickly moved on to making a swerve drive. Swerve drive was a lot more complicated. My initial attempt at swerve drive was terrible as it did not follow any of the mathematics behind swerve. It barely worked so I moved on to more fun tasks.
Early vision tests#
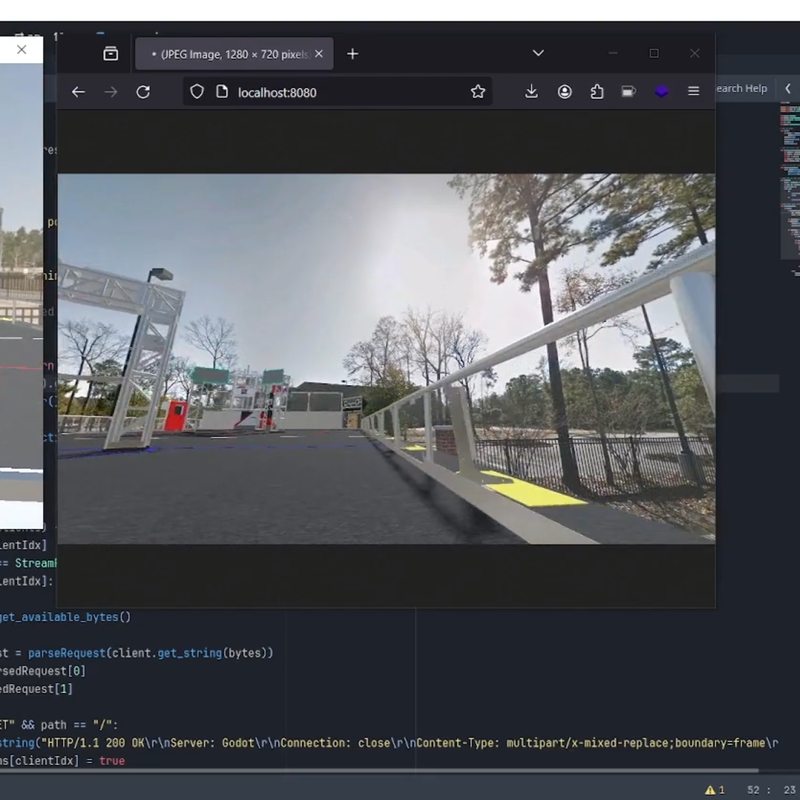
When I first made this project I had intended it to be used for vision testing, however, this never got utilized and the code eventually got deleted. While it never got used, I implemented a first-person camera on the robot to create a web server using raw sockets and share an MJPEG stream with any viewer. Here is it working:
Confusion#
I was pretty burnt out over the project by now so I handed over the project to Lincoln. He made some great improvements like adding a UI, but when implementing better swerve drive code, the whole codebase finally gave out and was impossible to debug. We left the project in this state for a few weeks while we worked on the actual code.
Back with vengeance#
Correct code#
After I was refreshed I picked back up the project and reverted the code to where I left off before handing the project over. (Yes I know this seems mean but I was planning on re-adding the features once it got stable). I then looked up the actual code for swerve drive and I found this blog by Dominik Winecki. This blog was very helpful and it included the code used to generate the models. I implemented all the code correctly and it was driving correctly, in certain conditions.
Quick Hacks#
This is when I found out the first of many consequences of using the Godot vehicle body. It turns out that there is no way to set the velocity of the wheel, only to set the engine power. To counteract this, I implemented a PID controller in the game and tuned it to set the velocity of each wheel.
extends Node
class_name PIDController

var prev_error: float = 0.0
var prev_integral: float = 0.0
var prev_time: float = 0.0
@export var k_p: float = 0.01
@export var k_i: float = 0
@export var k_d: float = 0

func _init(pidValues: Vector3 = Vector3(0.01, 0, 0)):
    prev_time = Time.get_ticks_usec()
    setPID(pidValues)

func calculate(setpoint, pv):
    var time = Time.get_ticks_usec()

    var dt = time - prev_time
    var error = setpoint - pv
    var integral = prev_integral + (error * dt)
    var derivative = (error - prev_error) / dt

    var value = (k_p * error) + (k_i * integral) + (k_d * derivative)

    prev_error = error
    prev_integral = integral
    prev_time = time

    return value

func setPID(pidValues: Vector3):
    k_p = pidValues.x
    k_i = pidValues.y
    k_d = pidValues.z
This hack was working fine until you started rotating the wheels. This is when I figured out that the Godot wheels have a bug where they calculate RPM around the starting axis, not the current one. This means that when you turn the wheel 90 degrees at 50 rpm it would say that it was spinning at 0 rpm. This was bad. I contacted the discord and one guy suggested using another hack that uses trig to calculate the wheel speed. This works but it degrades in accuracy the closer you get to 90 degrees.
corrected_rpm = wheel.get_rpm() / cos(wheel.steering)Done#
After fixing the buggy wheels, I could test the correctly implemented swerve code and it worked great. I added other modes like field relative and field relative rotation. This completed the basic, correct, swerve chassis.

Busy season#
After fixing everything I left it like this while I worked on robot code, occasionally bringing it out for drivers or kids to play on it and it worked fine for what it was. However, I was not done…
Improvements#
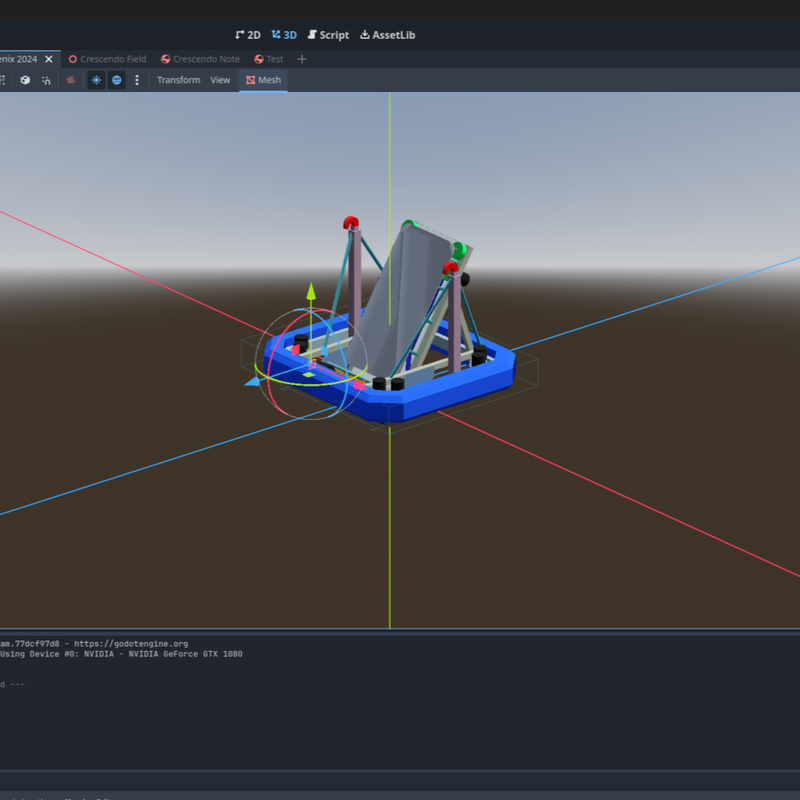
During competitions, programmers can get bored if there is nothing to code. Luckily I brought my gaming laptop with the source code of the simulator. During the competitions, I would slowly improve the simulation like porting a low poly replica of our competition robot into the game.
More issues#
I would have imported the full-quality CAD model but the origins were super messed up and cleaning them would have taken hours. (Trust me I tried). After importing the actual robot I realized that the wheels were not holding up the robot, instead they were touching the ground and the suspension built into the Godot wheels was inverted while the chassis of the robot was sliding on the ground. This was not ideal so I set the stiffness and travel to max and 0 (respectively). This just made the robot jump around to the floating point imprecision when Godot was calculating suspension. I asked the Godot discord again, but this time no one had any hacks. I tried to make my wheel physics but deemed it too hard and not a good use of my time so I reverted to the original setup.
Fun stuff#
After having a decent enough robot I coded controls to pick up and shoot notes out of our launcher. I used a raycast to detect notes and if the intake was pressed it would reparent the note to the robot and freeze it in the chamber. When the shoot button was pressed it would move the note and add velocity to shoot it out of the cannon. I spread notes across the field and a button to spawn new ones. This is where I stopped and where it is today. The team drivers said I was 90% realistic if it counts for anything.
Future#
In the future, I wish to rewrite the wheel physics and get rid of the ugly hacks. Maybe add back the ui and introduce multiplayer. If anyone wants to help here is the github. Make sure you are on branch drake.